Difference between revisions of "High Noon"
m (→Walkthrough: Whoops...) |
m (→Notes: Modified first note.) |
||
| Line 23: | Line 23: | ||
==Notes== | ==Notes== | ||
| − | * This mission gives you 10 000 points if you manage to get the Sathanas on your list of kills. | + | * This mission gives you 10 000 points if you manage to get the Sathanas on your list of kills. This can be achieved by you inflicting more damage on it than any of your wingmen, or by inflicting at least 30% of full hull damage. |
* If you order your wingmen to ignore the Sathanas, so will the Colossus. | * If you order your wingmen to ignore the Sathanas, so will the Colossus. | ||
* If the fighterbay of the Sathanas gets disabled, you may not be able to complete the Destroy Cancer objective. | * If the fighterbay of the Sathanas gets disabled, you may not be able to complete the Destroy Cancer objective. | ||
Revision as of 08:36, 19 August 2008
| Previous Mission
|
Campaign Walkthrough | Next Mission
|
ACT 3, MISSION 2
Fighter squadron: 203rd Scorpions
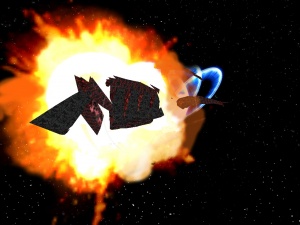
Description: Assist the GTVA Colossus in destroying the SJ Sathanas
Background
Following Alpha's disarming of at least two of the Sathanas' main guns, the Sathanas entered Capella to be confronted by the GTVA Colossus. If the Sathanas still has at least one main turret operational after Bearbaiting, the Sathanas also decimated an allied fleet near the Capella node. Alpha is deployed, once again, to provide bomber support for the Colossus.
Walkthrough
You are not allowed to choose your loadout for this mission. The ship you will be flying is the GVB Bakha, armed with the GTW Mekhu HL-7, GTW Akheton SDG, a bank of GTM Trebuchets and a bank of Helios torpedoes.
This can be the easiest mission in the whole game if you performed well in the previous mission. If not, you still have work to do because the Sathanas can take out the Colossus even with one beam turret operational. Fortunately, due to differences in timing, FPS, maneuvering, etc., the Colossus is usually safe once you're down to one turret. If the flak guns are still operational you may want to order your wingmen to take them out for you.
The Basilisks can be really annoying, but you can usually take several out with Trebuchets at long range before you engage the Sathanas. Fortunately, there are only eight of them, as opposed to the multitude in Bearbaiting, so when the second wave arrives, just order your wingmen to cover you. If you've gotten all four turrets, of course, feel free to take them out yourself to get credit for the extra kills.
You can ensure you get the kill for the Sathanas by making sure you inflict more damage on it than any of your wingmen. You can do this by destroying AAA and flak turrets with your missiles and shooting down subsystems with your primaries. If your wingmen are busy with the Basilisks or if you've ordered them to depart, this should be pretty easy. After a 10-minute exchange of beam fire, the Sathanas throws in the sponge.
Notes
- This mission gives you 10 000 points if you manage to get the Sathanas on your list of kills. This can be achieved by you inflicting more damage on it than any of your wingmen, or by inflicting at least 30% of full hull damage.
- If you order your wingmen to ignore the Sathanas, so will the Colossus.
- If the fighterbay of the Sathanas gets disabled, you may not be able to complete the Destroy Cancer objective.
