Difference between revisions of "Herra Tohtori's texturing tutorial"
m (PNG is generally supported) |
(Revert - this is Herra's texturing tutorial, not The E's.) |
||
| Line 34: | Line 34: | ||
*not recommended for final, distributed mods | *not recommended for final, distributed mods | ||
| − | ===PNG=== | + | ===PNG (not generally supported yet)=== |
| − | *very recent addition to the code, | + | *very recent addition to the code, refer to SCP documentation and wizards to find a build that supports this format |
*lossless compression - small file size, often smaller than RLE-compressed TGA | *lossless compression - small file size, often smaller than RLE-compressed TGA | ||
*supports 24-bit or 32-bit textures (RGB or RGBA) | *supports 24-bit or 32-bit textures (RGB or RGBA) | ||
*expected to replace TGA as a lossless, easy-to-use WIP file format for textures (native preview format on Windows OS, which TGA and DDS files lack) | *expected to replace TGA as a lossless, easy-to-use WIP file format for textures (native preview format on Windows OS, which TGA and DDS files lack) | ||
| − | *similar in terms of video memory usage as TGA; regardless of file size, the game considers these as uncompressed bitmaps and their memory use depends simply on resolution and amount of channels. A | + | *similar in terms of video memory usage as TGA; regardless of file size, the game considers these as uncompressed bitmaps and their memory use depends simply on resolution and amount of channels. A 10242 resolution PNG takes the same amount of video ram as a 10242 TGA or 10242 uncompressed DDS file, and in addition it uses more processor cycles to decode the compressed data into bitmap format. |
*main usage purpose as a work-in-progress and interface file format | *main usage purpose as a work-in-progress and interface file format | ||
*not recommended as any in-game graphics format for final distribution of the mod, use DDS for ship textures, effects and backgrounds instead. | *not recommended as any in-game graphics format for final distribution of the mod, use DDS for ship textures, effects and backgrounds instead. | ||
Revision as of 10:03, 4 January 2011
This article is a near-copy paste from the original source. The following alterations were made: Spelling fixes, wikification
Contents
Author's foreword
Welcome to The GIMP Thread!
This thread, as its name suggests, is dedicated to using GIMP with FS2_Open modding as a focus. In other words, how to use The GIMP to make image files for the purposes of FS2 modding. Photoshop can be utilized much in the same way, but GIMP is a free program and very much sufficient for the vast majority of tasks required for making image files that FS2_Open can use, which is why I will be using that for instructions and whatnot - also, I have no experience with Photoshop at all.
The basic idea is to have a concentrated knowledge base about how to use GIMP for the community's purposes, rather than spreading the information all over the place in response to individual topics; goodness knows how many times the process of making planet textures, shine maps or the ever-elusive normal maps has been described on the forums only to be asked again by a new modder in a month's time. I'm also going to stickify this thread and add new sections to this initial post as people ask questions about it.
So, let's get on with it.
Image formats and types
FS2_Open can use the following image formats:
DDS
- Direct Draw Surface. Full of awesome and sauce. Use this whenever you can (except for work-in-progress editing - TGA is better for that purpose).
- should always have power-of-two dimensions, e.g. 32x32, 64x128, 512x1024, 2048x2048 or the like.
- to avoid strange issues with older graphics cards, make sure that both height and width dimensions are at or above 16 pixels. In other words, recommended minimum resolution is 16x16.
- DXT compression reduces video memory consumption to either 1/6th or 1/4th compared to uncompressed texture of same resolution
- DXT1 compression is for files with no alpha channel
- DXT3 and DXT5 compression include an alpha channel
- uncompressed DDS files can be used when the DXT compression is too hard on the image quality. u888 for RGB files, u8888 for RGBA files.
- some effects can also use u555 and u5555 formats. These are much the same as uncompressed 24- and 32-bit files (u888 and u8888), but instead of 8 bits per channel they have five. This makes them a good option for, say, converting PCX weapon effects and such without getting horrid compression artifacts. They are larger than DXT-compressed files, but smaller than full 24/32-bit files.
- supports mip maps included in the image format itself
- speeds up loading times as the GPU can use this image format directly without need to convert it to uncompressed bitmaps, as is the case with PCX and TGA textures.
TGA
- 24-bit RGB or 32-bit RGBA files.
- alpha channel for transparency when needed
- excellent work-in-progress format
- high video memory use
- can be used for all modeling purposes to see how the stuff looks like - including normal maps.
- do not be confused by apparently very small TGA files. The TGA format supports run length encoding, which can significantly reduce file size for stuff such as starfields and some other texture types; however, this will not reduce memory consumption because the encoding needs to be decoded before the bitmap can be sent to the graphics card to use and show to you.
- not recommended for final, distributed mods
PNG (not generally supported yet)
- very recent addition to the code, refer to SCP documentation and wizards to find a build that supports this format
- lossless compression - small file size, often smaller than RLE-compressed TGA
- supports 24-bit or 32-bit textures (RGB or RGBA)
- expected to replace TGA as a lossless, easy-to-use WIP file format for textures (native preview format on Windows OS, which TGA and DDS files lack)
- similar in terms of video memory usage as TGA; regardless of file size, the game considers these as uncompressed bitmaps and their memory use depends simply on resolution and amount of channels. A 10242 resolution PNG takes the same amount of video ram as a 10242 TGA or 10242 uncompressed DDS file, and in addition it uses more processor cycles to decode the compressed data into bitmap format.
- main usage purpose as a work-in-progress and interface file format
- not recommended as any in-game graphics format for final distribution of the mod, use DDS for ship textures, effects and backgrounds instead.
PCX
- native, retail-based FreeSpace 2 image format. Will work with the retail game assuming the stuff that uses it is also compatible.
- limited to 8-bit aka 256 colours (or 255 if you use one colour for transparency support)
- pure green (#00ff00 or [0,255,0]) is considered transparent as a rudimentary one-bit alpha channel
- ANI file frame format - when you're building animation files for interface, you'll need to use this format for now.
- should only be used for modding for Retail FreeSpace 2 or some of the interface art - mainly bits that are not yet compatible with more sophisticated image formats.
JPG (technically)
- Don't ask me why this format is supported. It's lossy compression-wise and uses the same amount of memory as uncompressed TGA, so there is no advantage whatsoever in using it.
- If you use this for FS2_Open, Admiral Petrarch is going to demote you to a freighter pilot. Seriously, don't use this.
From these formats, GIMP offers native support for PCX and TGA files. DDS support is very good with this plugin, though I prefer saving images to TGA with GIMP, and later converting the files to desired format with NVidia's DDS Texture Tools, meaning nvDXT basically. AMD's Compressionator is a comparative product.
Whichever conversion method you prefer, you still need to know about what format to use for what purpose, which brings us to next section.
What files to use and for what purpose?
Basically, most if not all files you make for FS2 modding should be DDS files. However, both DDS and TGA files are used in much the same fashion by the game, so the file format itself is not always as important as the form of the file.
By that I mean the following: Should the file have alpha channel or not? Should it be compressed or not? In case of PCX files, how can I make it have 256 colours instead of 16 million? These things are important to know; after your file is in proper form, you can easily convert between TGA and DDS formats for example.
To explain some of these things, a small introduction to the image files is in order I believe. Information is stored onto channels in image files. Each pixel has three, or in some cases four, channels or values that define how the pixel looks. The first three channels are of course the typical red, green and blue colour channels and they control the colour of the pixel. Each of these channels has a bid depth; typically 24-bit RGB files have eight bits per channel, meaning each channel can has values ranging from zero to 255. The fourth channel used in 32-bit images is slightly different. It is called the famous alpha channel and instead of controlling the colour values, it controls the opacity of the pixel.
In most cases, it's easier to think of alpha channel as a single, greyscale layer that defines the transparency of the colour layer. Basically, black is fully transparent while white is fully opaque.
Typical purpose for a 32-bit RGBA (red-green-blue-alpha) file in FS2_Open would be a transparent cockpit canopy texture, or a background planet bitmap. These require some parts to be transparent and some parts opaque, so alpha channel is a necessity.
Where to use an alpha channel
- transparent textures
- shine maps (controls environmental mapping)
- normal maps (this arcane art will be handled later...)
- planet bitmaps
- squad insignias
- some effects (dark smoke instead of glowing particle fog for example)
Where to not use an alpha channel
- non-transparent diffuse textures
- glow maps
- shine maps if you absolutely do not want environmental mapping at all
- nebula backgrounds
- star field texture
- glowing effects - these use additive blending for transparency, ie. black sections of the texture add nothing to the background. Included are such effects as subspace vortices, weapon effects, beams, engine glows, many particles etc.
What DDS type should be used?
If, as you should, you are using DDS format, the need for alpha channel largely dictates which sort of compression you should select.
As described in formats section, DXT1 or u888 should be used when you do not need alpha channel. When you need alpha channel, you should use either DXT3 or DXT5 compression, or alternatively u8888 format - some types of effects suffer too greatly from the compression, and you'll learn to recognize these pretty soon; files with smooth gradients usually come out as blocky pixelated mess after DXT compression, so uncompressed DDS files have their uses. You'll need to balance quality with memory consumption. Sometimes uncompressed u8888 file of 512^2 resolution can look a lot better than a DXT5 compressed 1024^2 resolution file, so larger is not always better... and as these examples use the same amount of memory, you should pick the smaller uncompressed over the larger compressed. A perfect example of this are the warpmap effects, aka. subspace vortices.
As to whether use DXT3 or DXT5 format: When in doubt, use DXT5. The only meaningful difference between these is the handling of alpha channel. As described here, DXT3 is better suited for sharply defined changes in opacity - like the change from opaque text to transparent surrounding in name plates - while DXT5 is better suited for more gradual changes, like for example a smoke particle effect or planet's atmosphere blending into transparency.
Technically, DXT3 uses explicit alpha while DXT5 uses interpolated alpha. Whatever that means, you can go and find out here. Also, DXT3 uses the same compression for RGB data as DXT1, and in some cases DXT5 offers better compression results, so like said... when in doubt, DXT5 will work just fine.
And again, experimenting and comparing different compression results is recommendable. Not all textures compress as well as others on same settings.
Should mip maps be used or not?
Mip maps are a great thing that basically reduces texture aliasing, or "shimmering" when viewed from distance. You could consider them as Levels of Detail (LODs), but for textures instead of models. The DDS format allows one to store the mip maps into the texture file in layers rather than forcing the game to generate them on the fly, and as far as I know, only the appropriately sized layer is used by the GPU at any given moment, which further reduces video memory use.
Because of their nature, though, they can be unwanted ballast in some image types. Basically, things that are never seen in smaller scale would not benefit from mip maps at all. Things like this would be skybox textures or interface files. Also, many effects do not gain any benefits from mip mapping - a good example of these would be glow points, engine glows and weapon effect textures.
As a rule of thumb, if the texture is used by a model (excluding skyboxes), it should always have mip maps. Consult your DDS conversion utility on how to change mip mapping settings; they should offer a way to turn mip maps on and off, and even adjust the filter that generates the mip maps from LOD0 layer.
Now that we hopefully know something about the file formats and types, we can get on with specific pieces of modding, and I encourage you to post questions about different sorts of topics and I'll add answers to the topics as they accumulate.
How to make good and proper shine maps?
FS2 Open shinemaps actually control specular reflections with their colour channels (red, green and blue) and environmental reflections with their alpha channel. To take full advantage of this, you obviously need alpha channel and thus file format should be 32-bit TGA for working, and likely DXT5 compressed DDS file for distribution.
It's important to understand that the shinemap should NOT be a gray map. The colours are there for a reason, you know. Desaturating the shinemap tends to wash out a significant amount of detail from the diffuse texture. If anything, I've found that it is better to increase the saturation in the shine map compared to the diffuse map, but reduce the brightness significantly.
Environmental reflectivity should be applied as a mask after you are satisfied with the specular reflections. Basically, a black alpha channel will give that part zero environmental reflections, while full white alpha will make the part look like a mirror. By experience I can say that you will usually want a mostly black or at least very very dark alpha channel, but of course that depends on the ship's surface in question. Polished or chromed surface would be much more reflective, but not necessarily shinier. Same applies to cockpit canopy and other glass parts. I personally think that glass should not be white in RGB section of the shine maps. If you think about it, glass does not really have much of a specular reflection - it works more like a mirror. Something around 30-50% gray for the shine works great along with about 75-90% environmental reflections. For a mirror, you would likely want black shinemap and white alpha channel for full environmental reflections.
As a rule of thumb - shine map needs to be half as bright as you would think when making it in your image editor... but this is something you will only learn by playing with things, and with time you'll develop some sort of sense of what kind of shine map you want and how it will look in-game.
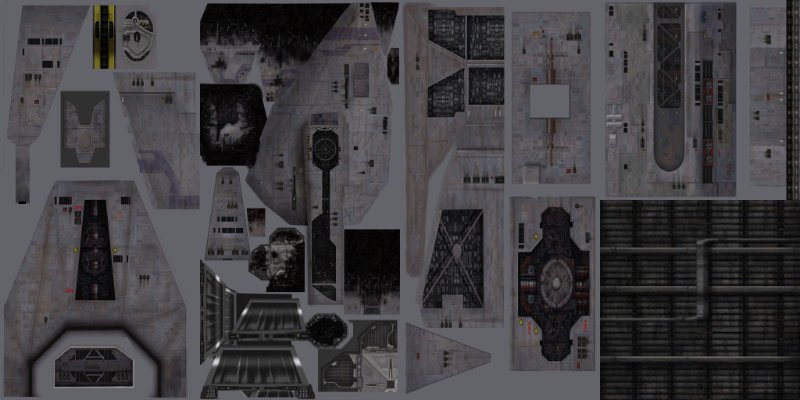
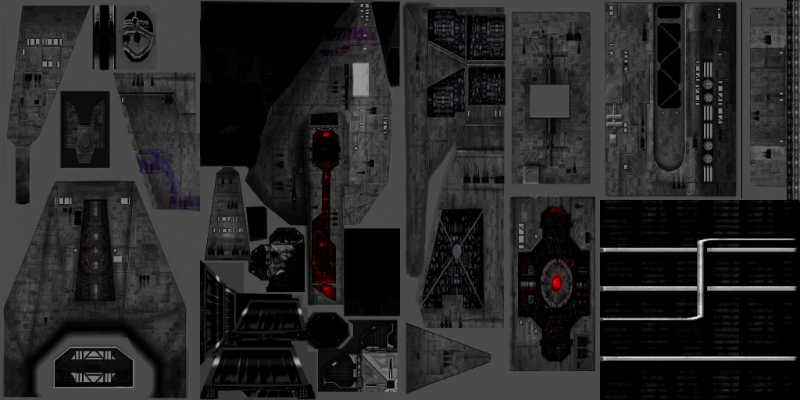
Here's a comparison of the diffuse texture of the GTC Fenris and the RGB part of the shine map below it:
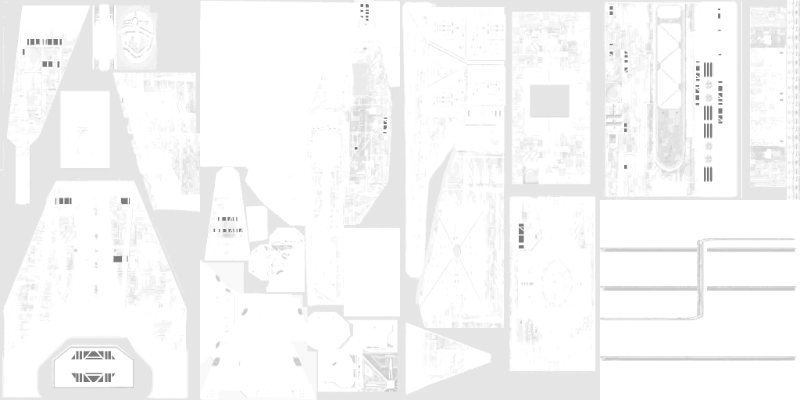
As said, that is the RGB component of the shine map and it controls the specular reflection intensity and colour. The alpha channel in this shine map looks like this:
And when combined, it looks like this:
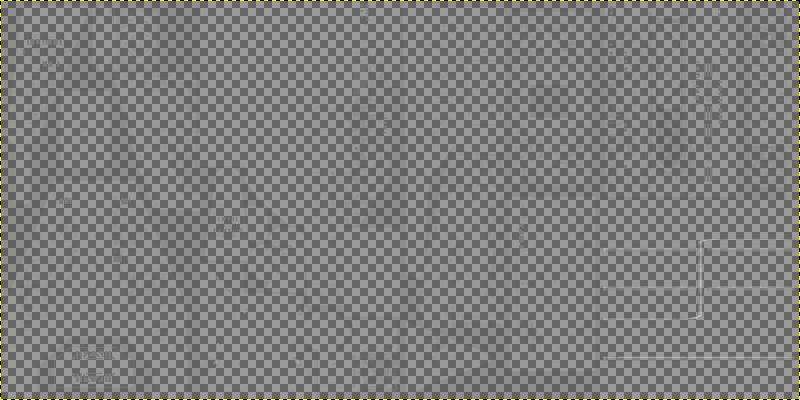
...or, as you see it in GIMP with default checker pattern background, it looks like this:
How to make good and proper glow maps?
Making a good glow map can be trickier than you would think. You can use glow maps to add baked-in lighting - the GTF Hercules is a good example of this - or to show the light coming from within the windows on capital ships, or for other purposes.
Glow maps work by adding the contents of the glow map on top of the diffuse texture, so you will not need alpha channel for these babies. You will also want all non-glowy parts to be full black on all occasions.
Also, you probably want to remember that if you have full white on the glow map, it will drown out ]everything below it. For example, if you first spend a lot of time and effort to add windows on the shine maps of a capital ship, making the have full white glow will completely waste all that as the glow map will shine through everything that the environmental and specular lighting might do with the windows. Instead, I would recommend keeping the glow map's intensity below 75-85% at almost all occasions. A good example of this is the GTC Fenris and Leviathan in the 3.6.10 MediaVP's (although the windows there are at about 95% intensity). If you open the ship lab (press F3 in main hall), navigate to either cruiser and look carefully as the ship rotates, you will see hints of environmental reflections through the glowmap even when they are activated. Turn the glowmap off from render options and you'll see how the windows work out without the glow map.
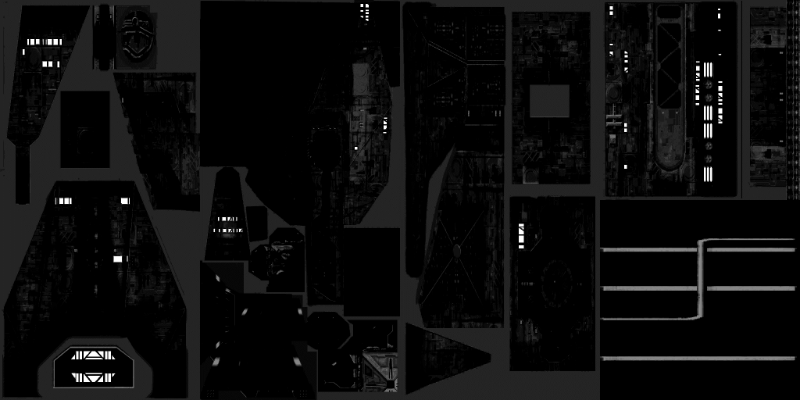
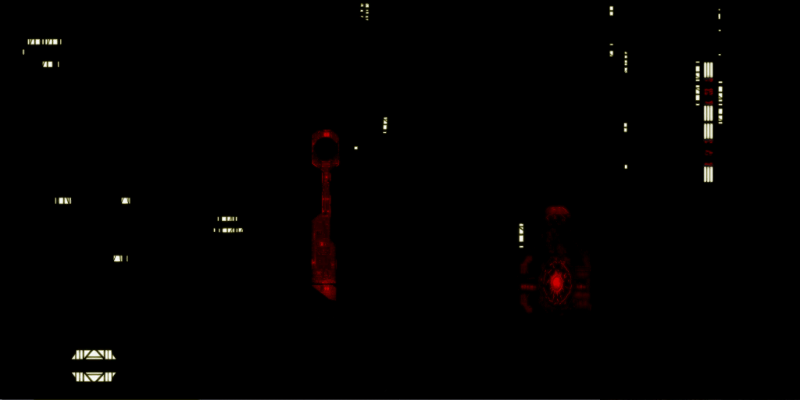
The Fenris glow map looks like this:
Besides, there's not much point to having such bright interior lighting anyways...
How to make good and proper planets?
Planet bitmaps will need an alpha channel. Otherwise, you'll end up with either a black box surrounding the planet, or the background stars shining through the planet. Other than that, the Celestial Objects Thread would probably be a better place to discuss planets, although I will probably add specific alpha channel management tips to this thread eventually, along with other assorted trickery.
How to make good and proper normal maps?
Ah, normal maps. There seems to be a lot of dread towards these things for some reason, even though they are reasonably simple to manage - you just need to understand what is going on, and things will start working. For making normal maps with GIMP, a normal map plugin is needed and can be aquired from here. You can also use stuff like CrazyBump, but personally I greatly prefer to control the process manually.
To begin with, a short description of normal maps and how they work is in order, as it will seriously help to reduce the amount of guessing needed in the process.
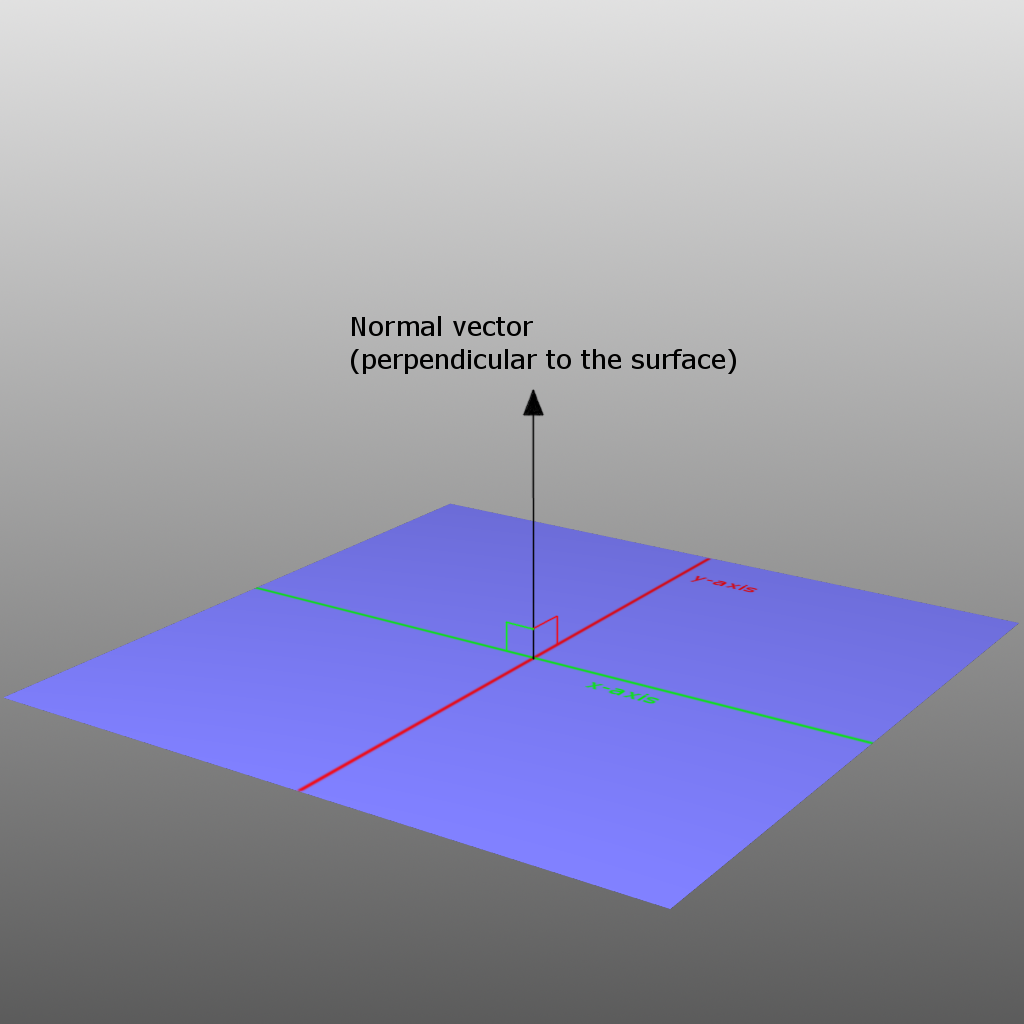
Normal maps, as the name suggests, do not adjust the texture itself but instead they affect the normal vector of the surface. Normal vector is simply a vector that is perpendicular to a surface at any given location:
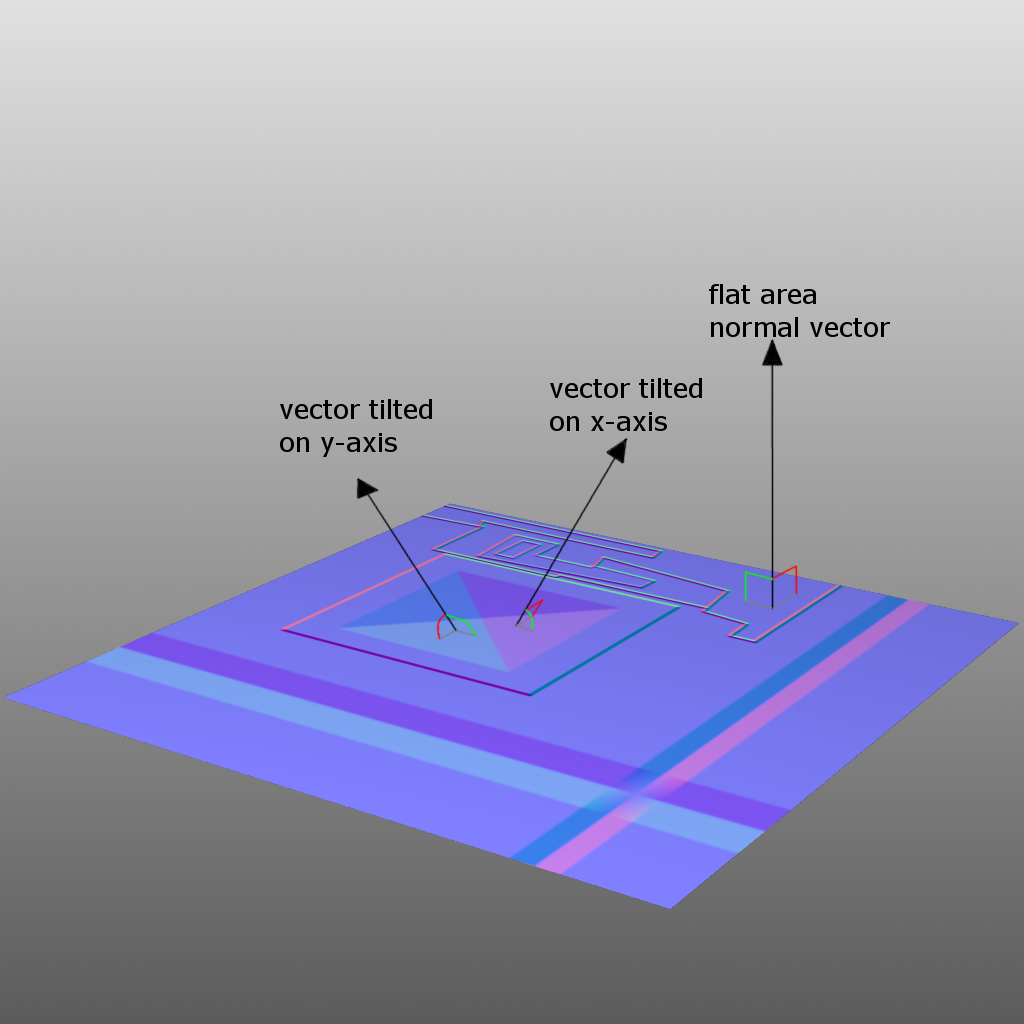
The important thing that the normal maps affect is lighting. As the normal of the surface is affected, a shader will adjust the reflection of that part of the surface, which gives an illusion of a geometry change that is very impressive and, if the normal map is good, also very realistic and our eyes will accept it as added geometry detail with no questions asked. For example, in the following sample normal map, the normal vectors in three locations would look about like this:
So, normal maps can be used to affect the surface geometry of ships without adding any polygon detail to the model itself. The sides of the pyramid would look tilted simply due to lighting.
As every plane or surface has two axes (you can call them x and y, or u and v-axes, doesn't really change anything), the normal vector needs two channels to adjust it's direction on both axes. Typical normal map uses red and green channels for this. As you might have guessed, the middle tone in both channels means that the vector points straight up and thus surface normal is not adjusted. So, if both red and green channels have the value 128, the vector at that pixel is pointing straight upwards. Changing the values to either way will affect the direction of the vector accordingly. However, due to trigonometric realities, there has to be some upper limit to which the normal vector can be turned; it can not turn 90 degrees even if you use values 0 or 255 for the channels. In fact, if you do, you will introduce so called "black flecks of doom" to the normal map.
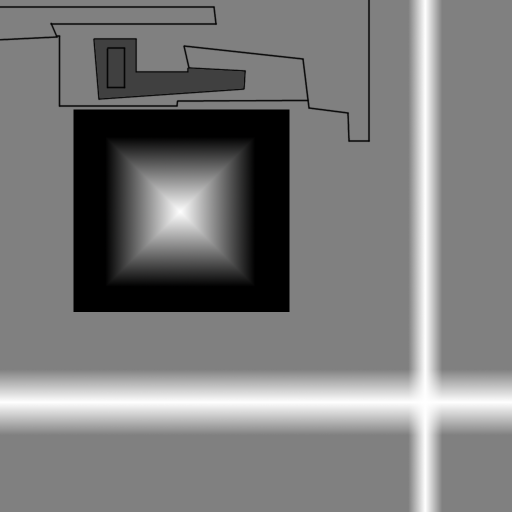
To begin creating a normal map, one must first make a height map. Here is a simple sample height map:
Quite obviously, dark areas are recesses and brighter areas are elevated areas. With lines and gradients, one can make many sorts of shapes, slopes, grooves and bumps on the height map.
After the height map is finished, it needs to be converted to normal map format. The normal map plugin offers many options, of which the most important are Filter and Scale. The Filter adjusts the algorithm that the plugin uses to read the height map. Basically, 4 sample gives a very sharp normal map and 9x9 gives softer normal map but higher gradient quality. Something in between usually works better, like 3x3 or 5x5, but each normal map needs to be experimented with to reach optimal results so there is no truths on which one to use.
The scale will affect the perceived strength of the normal map. Typically, fighter sized ships should have somewhat larger scale than capital ships, but this isn't an absolute rule either. GIMP normal map plugin outputs pretty good maps that look good in FS2_Open starting from scale 20 and going up to 40 or so, but like said, you need to define the values by yourself for each normal map.
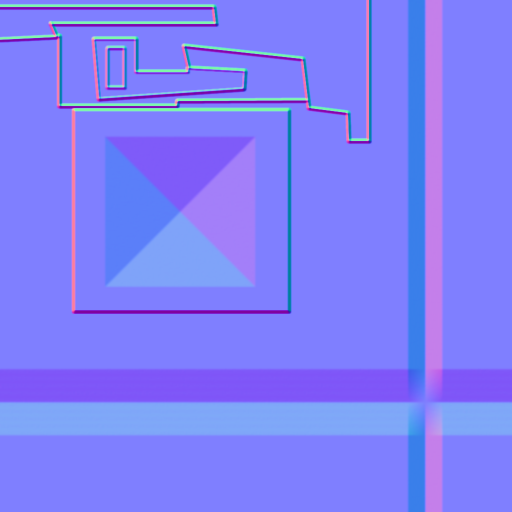
This normal map uses 9x9 Filter and 20 units Scale:
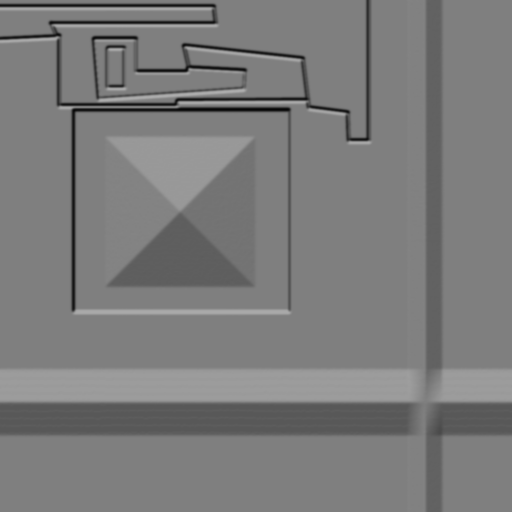
As a result in the game, the lighting of flat plane would look about like this:
This is just a cheap bumpmap sample of the height map, but that's about how it would look like.
It's also important to note that despite the appearance of the normal map, the bright cyan on the "underside" of the pyramid doesn't mean that it's wrong. Humans tend to assume that light comes from above, and we interpret cyan as brighter colour so the normal map might seem inverted when you look at it in image editor. This is not the case; the normal map is perfectly fine with the default settings on GIMP's normalmap filter. You'll get used to it, but it might seem unsettling at first.
However, when you have the purplish normal map, you can not yet use it directly in FS2_Open. FS2_Open supports DXT5nm, or "normal map style" DXT5 compression, which means that the game does not read red and green channels that the typical purple normal maps use. Instead, they read information from green and alpha channels.
This means that to import a normal map into FS2_Open, you will need to transfer the red channel information into alpha channel. In addition, it's considered good form to fill the unused red and blue channels with black, but that is not truly necessary.
This can be done either by choosing to save the purple normal map into DXT5nm format, which automatically moves red channel to alpha, and usually copies green channel to both red and blue. It is a perfectly valid choice, but should you want to use uncompressed formats such as TGA or u8888 for increased quality, you will need to manipulate the channels by hand.
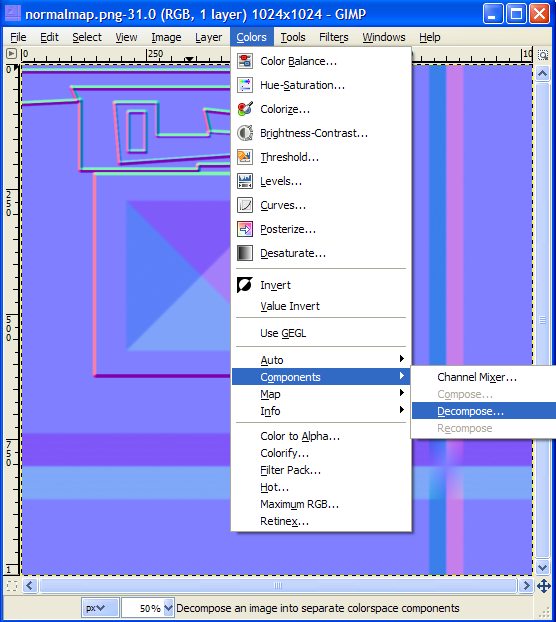
Fortunately, GIMP offers a pretty nice way to do this. As you have your purple normal map in sight, you will need to first add an alpha channel to the image [Layer -> Transparency -> Add Alpha channel], then Decompose the image to RGBA colourspace components:
Remember to select RGBA from the dialogue that opens, and it will split your normal map into four grayscale layers, one for each channel.
Copy Red channel information and paste it to Alpha channel. After that, select black colour and fill both Red and Blue channels with it. Then, Compose the image [Colors -> Components -> Compose], remember to select RGBA for the color model again, and you should be seeing something like this:
Now, when you are seeing this kind of result, you should be able to simply save it to any alpha-channel inclusive format, and FS2_Open should be able to use it as normal map. This includes TGA, DXT5 and u8888.
I'll address any questions that undoubtedly arise later, but as far as I can see, this is the gist of making normal maps. You can also use all kinds of tricks to add detail to the height map - like for example making some noise and then blurring it somewhat, which will give a somewhat "granulated" surface look - refer to the GVF Sobek normal maps in 3.6.10 mediaVP's for an example of that.
Also, you can make normal maps from multiple layers by stacking the layers on top of each other and making the colour 8080ff (flat purple) invisible, which will allow the details from lower layers to be visible while keeping the non-flat details of the upper layers overlayed on top of the lower one. This is beneficial if you need to deal with multiple scales and filtering options - for example, some small detail works better with 4sample and large detail better with 9x9, you can put them in separate height maps and combine thaem after you have applied the normal map filter to them.
