Tutorial - How to make a mod from scratch
Contents
Introduction
This tutorial covers the creation of a simple FS mod step by step with no prior knowledge required. It assumes you have FS2 and the latest MediaVPs installed, but the concept is globally the same (with different filenames and paths) if you wish to edit another mod or a Total Conversion.
Step 1: creating your "sandbox" mod
For a lot of reasons, we do not want to modify retail or MVP files directly. Those reasons include not breaking compatibility, facilitating debugging and facilitating backward compatibility - the vast majority of mods assume both the retail and the MVP data to be intact in order to function.
With Freespace Open, you can isolate all the files you modify, and only the files you modify in their own mod folder, and add dependencies (usually the MediaVPs) that contain the rest of the files you need.
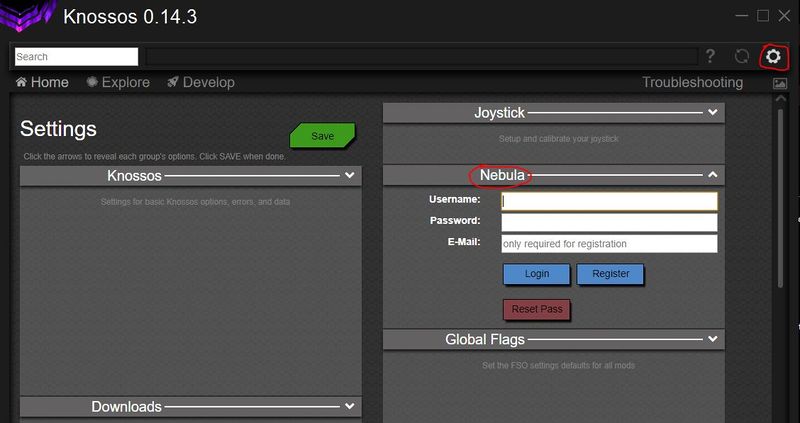
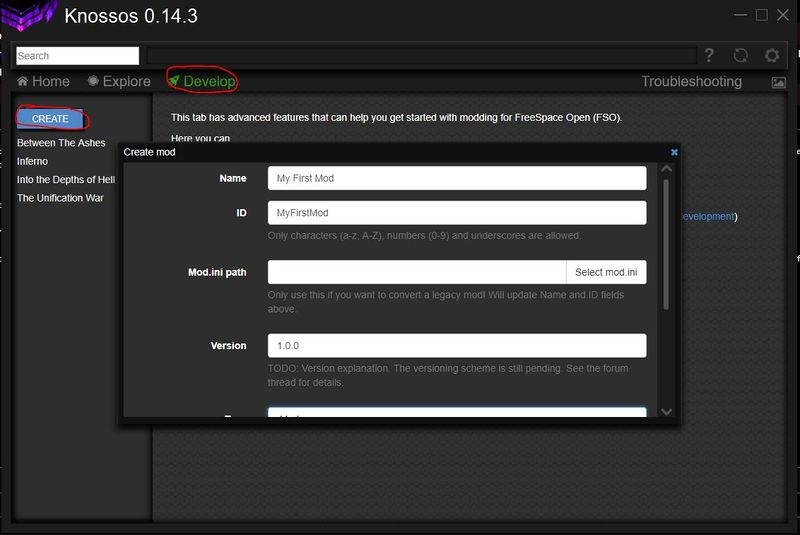
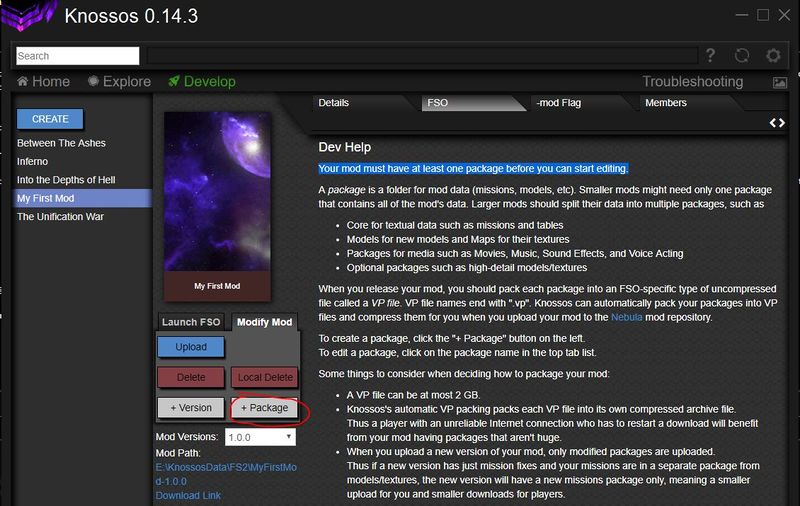
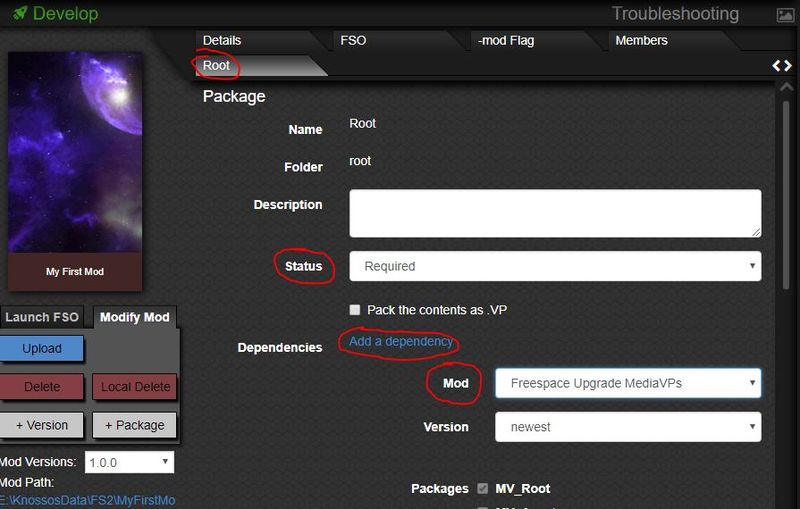
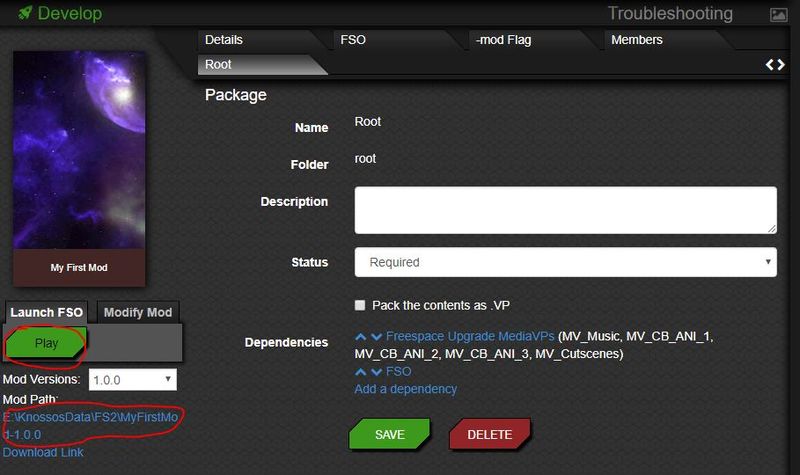
With Knossos
With wxLauncher
TODO
Step 2: Modifying a ship
| Text | Picture |
|---|---|
| We're going to start with something simple : create a modular ship table that replaces the Helios compatibility with the Harpoon for the GTF Myrmidon.
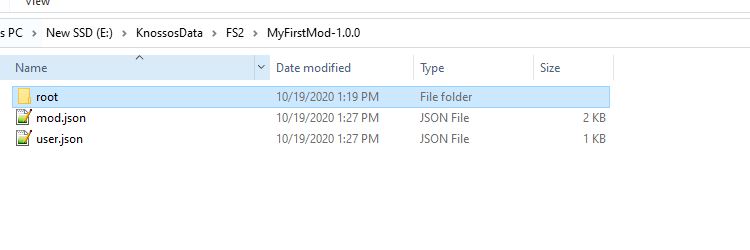
Whether you used Knossos or wxLauncher in Step 1, you should now have an explorer window opened on a folder named "data". Inside this folder, create a new folder named "tables". |

|
| In this folder, you will create a text file named "mymod-shp.tbm". Make sure you have file name extensions enabled in the explorer, as we really want it to be "mymod-shp.tbm" and not "mymod-shp.tbm.txt"
Open this file in a plain text editor like windows' Notepad, or a third party program like Notepad++ or Sublime Text, then copy this text into it and save the file (I'll explain what this does later). |
#Ship Classes

$Name:	GTF Myrmidon
+nocreate
+Tech Description:
XSTR("We changed the description here so we can quickly check that our mod works.", -1)
$end_multi_text
$Allowed SBanks:	( "Rockeye" "Hornet" "Tornado" "Tempest" "Trebuchet" "Stiletto II" "Hornet#Weak" "EMP Adv." "Infyrno" "Harpoon" )

#End
|
| Back in Knossos or wxLauncher, start the game again. If you go in the tech room and select the GTF Myrmidon, you should see that the tech description has been changed. | 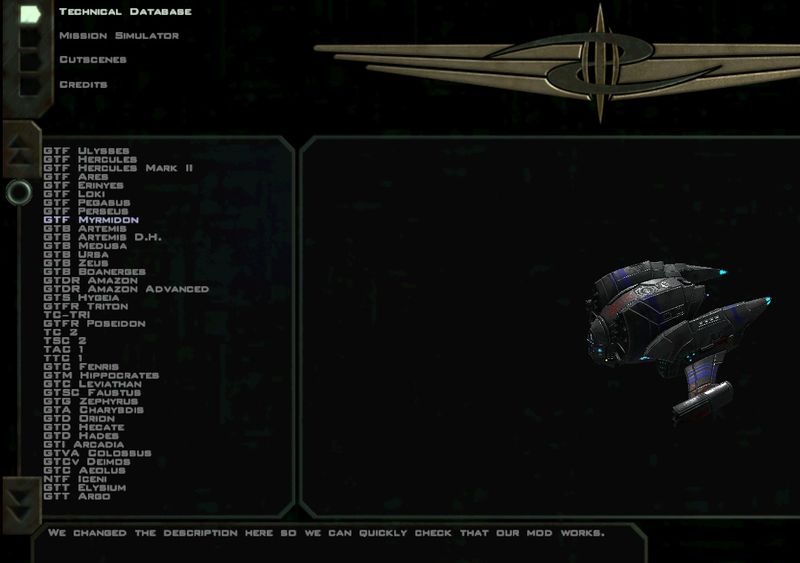
|
| Congratulations, you have successfully modded the game !
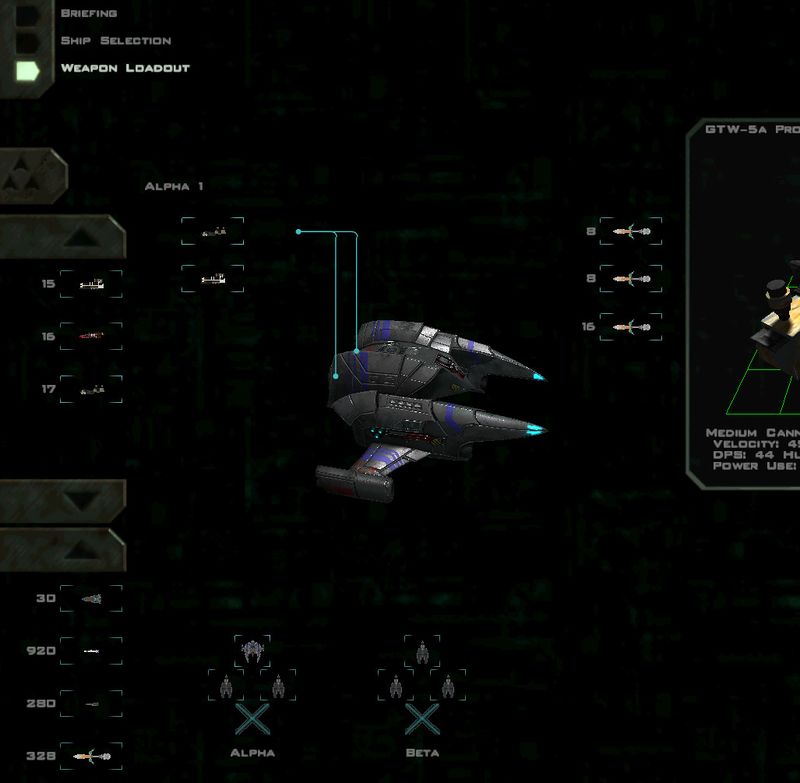
Now if you start a mission featuring both the Myrmidon and Harpoons, you will be able to equip the Harpoon and use it in-mission. For example, you can go in the Tech Room > mission Simulator and start SM1-06 The Great Hunt (if it isn't available because of campaign progress, press CTRL+SHIFT+S to unlock everything in the tech room, including missions). |
|
| So, how did we manage that? What did that file do?
Freespace follows a simple folder hierarchy when loading data. In our "data" folder, we created a "tables" folder, where FSO will look for table files (models are in the "models" folder, textures in the "maps" folder, missions in the "missions" folder, etc. You can find the detailed folder hierarchy in this page: Back in retail (and early versions of FSO), you could only use full table files. What we created instead is a "modular table", mymod-shp.tbm (note the TBM extension instead of TBL). This allows us to only enter the data we want to change, and not the entirety of the ships data the game requires for every single ship. The ships entry always starts with the "$Name:" entry. We follow it with "+nocreate" to tell the game that this is an existing ship we're modifying, and then the "+Tech Description:" and "$Allowed SBanks:" are the two entries we changed. You can find the details of the possible ships.tbl structure in Ships.tbl. Be careful, as the properties need to be in the order listed on this page. |
