Roadblock
| Previous Mission
|
Campaign Walkthrough | Next Mission
|
MISSION 3
Description: The Apesokari, crippled by a surprise attack by the Aesdherians, is attacked by an assault force, and Aleph wing must stop them.
Background
During the attack on the Sabre installation, the Apesokari was severely damaged by a surprise attack led by the AdCa Damocles. The Apesokari managed to jump out of the area, but her engines have broken down since that time, and her main guns are offline. In short, the Apesokari is crippled and, without outside assistance, is easy prey for an Aesdherian assault force.
Worse, such an assault force is already on its way, led by the AdCa Caliburn. Aleph wing, along with Beth and Gimel wings, are to defend the Apesokari against all comers. Daleth and He are being held in reserve should the need arise, while Zayin wing , composed of bombers, is tasked with dealing with the Caliburn once her main beam cannon is silenced.
The ACa Akrotiri is already on her way with a team of artisans to repair the Apesokari and to provide relief. Until they get here, the Apesokari is on her own.
Walkthrough
You'll be doing a lot of bomber intercept as well as disarming capital ships. My suggestion would be the Kato armed with a bank of Quasars and a bank of Cretes or Pharnecs, and packing your secondaries with Nightmares for charging the Aesdherian carrier near the end. You might be able to get away with the Tylisos armed with Quasars, using your turrets to kill the bombers' shields; however, I never found it survivable enough when dealing with the cap ships' guns.
The mission starts after a bit of dialogue with two wings of bombers with fighter escort jumping in to kill the Apesokari. These bombers are insanely fast (about 130 m/s on afterburner), have multiple guns, and will launch fast-moving torpedoes at close range. Given that the range of your primaries are too short for feasible warhead intercept, it's best to concentrate on killing the bombers as fast as possible. This is why I prefer the Crete for this task; its low energy drain means you can boost your engine power a bit to keep the range close with the enemy strike craft. Don't forget to deal with the escort when you have the chance, otherwise they will thin out your wingmen significantly.
After killing each wing of bombers, another will jump in to replace it; Storm wing will be replaced by Grue wing, and Furies 1-3 will be replaced with Furies 4-6. When one wing of replacements are killed, two Aesdherian cruisers, the Shade and the Ghost will jump in with additional fighter escort. The beam cannons on these cruisers need to be destroyed, so switch to your Quasars and engage them at maximum range (1500m). Try not to use all of your secondaries, as you will probably need them later. Once the cruisers are disarmed, they will jump out of the area.
While engaging the cruisers, two more wings of bombers (with more fighter escort) will jump in to attack the Apesokari. Deal with them like you dealt with the first wave. As most of your wingmen will be dealing with the cruisers, the new bombers will be mostly unengaged; this is probably when the Apesokari will take the most damage. Take care of the bombers quickly once the cruisers have been nullified.
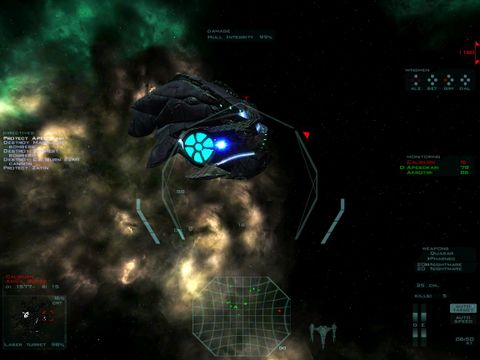
After killing one wave of bombers, an Aesdherian carrier, the Caliburn, will jump in, and you'll be tasked with destroying her beam cannon. This is probably the hardest part of the mission, as the cannon is well-armored and your wingmen will most likely still be dealing with the bombers, leaving you alone to close with the carrier and disarm her. Use your swarm missiles and Quasar guns to destroy the cannon as fast as you can.
After disabling the beam cannon, the Akrotiri will jump in to finish the Caliburn with her main cannon. It's more or less a fireworks display at this point. After the Caliburn is destroyed, the Akrotiri will launch two transports to help with repairs on the Apesokari. Land on the fighter bay of the Akrotiri, located at the bow of the ship, once they are launched.
Notes
- After completing this mission, you are promoted to Knight and given command of Aleph wing.
