Difference between revisions of "Guide to FS Open and git"
m (→Applying old patches (and conflict resolution)) |
m (→Applying old patches (and conflict resolution)) |
||
| Line 137: | Line 137: | ||
rough notes | rough notes | ||
* TortoiseGitMerge | * TortoiseGitMerge | ||
| − | ** by clicking on the line numbers on the left hand side you can select individual lines to apply | + | ** right click the line numbers in the "theirs" or "mine" windows to select "text blocks" which will be applied to the "merged" window |
| − | ** similarly you can select multiple lines | + | ** for simple conflicts you can also choose "theirs then mine" or vice versa from the right click menu |
| − | ** when lines are selected | + | ** by clicking on the line numbers on the left hand side you can select individual lines to apply |
| + | ** similarly you can select multiple lines by click/dragging on the line numbers | ||
| + | ** when "theirs/mine" lines are selected another right-click option becomes available, "copy". These lines can then be pasted to "merged" | ||
| + | ** you can also make edits in the "merged" window just like any other text editor | ||
Revision as of 09:14, 4 March 2014
Contents
Getting the source: Tortoise Git
(based on Getting_the_FreeSpace2:_SCP_Source_Code)
- Download and install Git For Windows (this is a dependency for TortoiseGit)
- Download and install TortoiseGit (you probably need to reboot after installing)
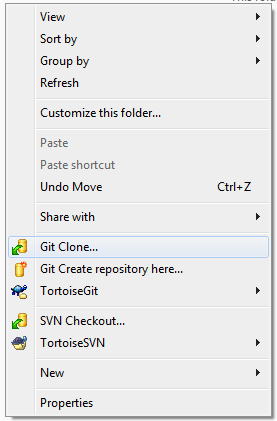
- Make a new folder on your HDD where you'd like to install the code. You'll need a fair bit of space for the code + the intermediate files when building it. Press right mouse and choose Git Clone from the list.
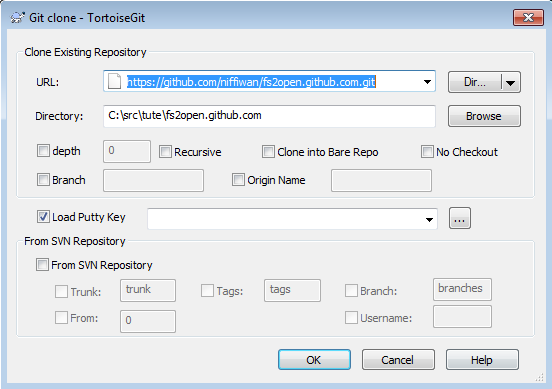
- A new window will open up. Cut and paste the URL of the FSO Github repository into the URL of repository box (https://github.com/scp-fs2open/fs2open.github.com.git)
- Press OK to begin downloading from the repository (this may take a few minutes, depending on the speed of your internet connection)
Simple Development: Tortoise Git
Note: the guide assumes that you will be developing using a github fork (which is recommended for everyone, SCP members and non-members alike)
- Go to the github webpage and create an account
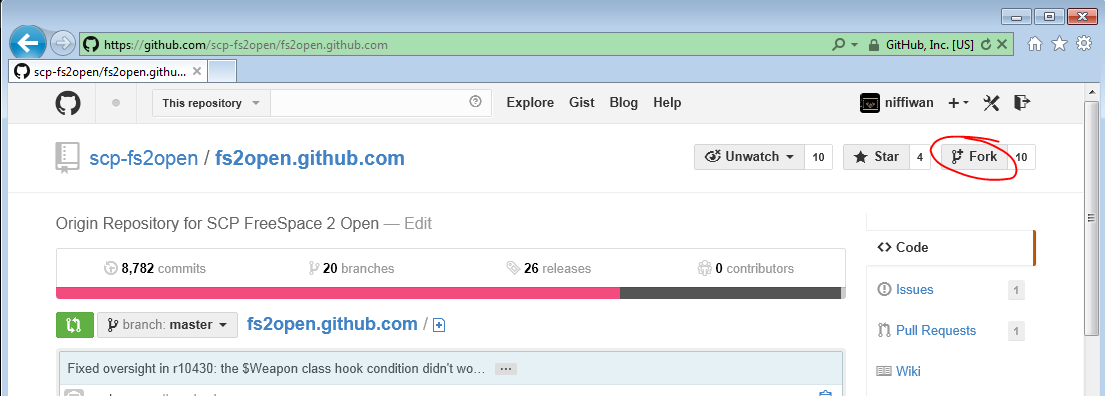
- Go to the FSO repository on github and click on Fork
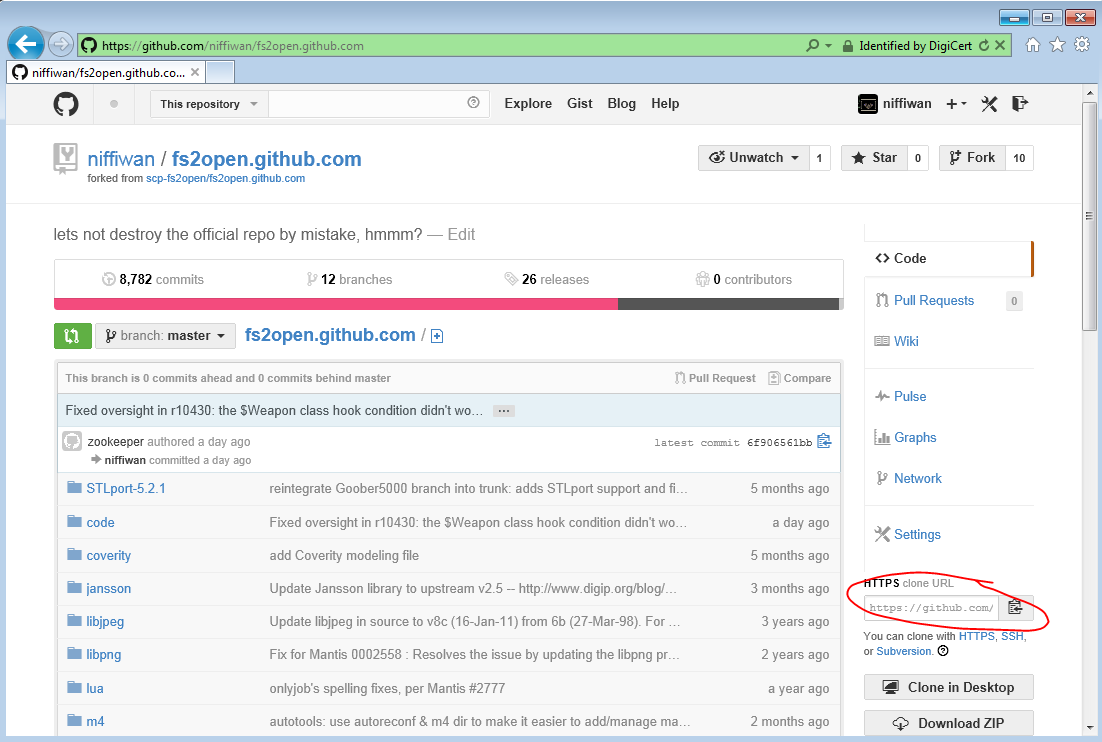
- Record the URL for your newly forked copy of the FSO repository
- Get the code per the guide above
- Note: you need to use the URL for your forked repository, not the main FSO repository listed above
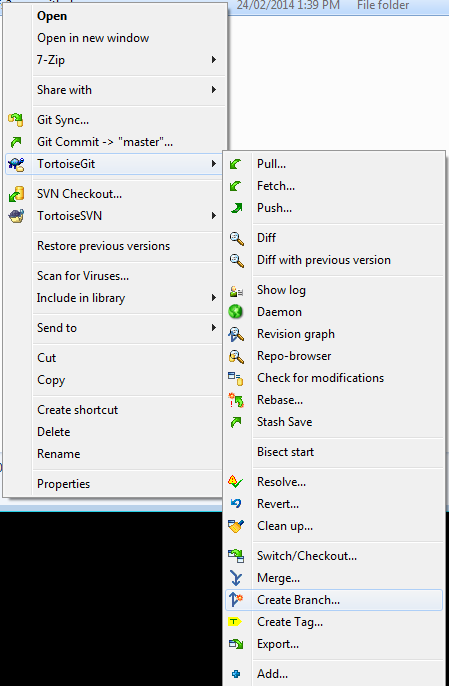
- Right click on the repository directory and select TortoiseGit -> Create Branch
- Note: all development should be done in a new branch, instead of being done in the "master" branch. It's just simpler
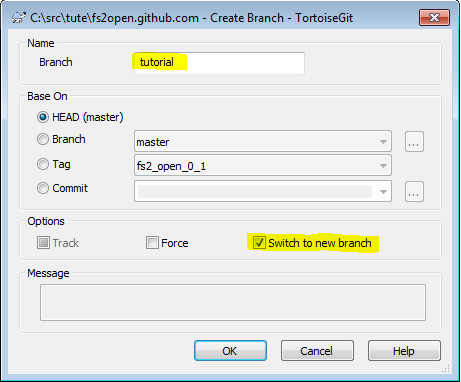
- In the new window, enter the name for the new branch, verify that the branch is based on HEAD (master) and check the "Switch to new branch" box
- Write some code with your Editor of Choice
- Test your new code
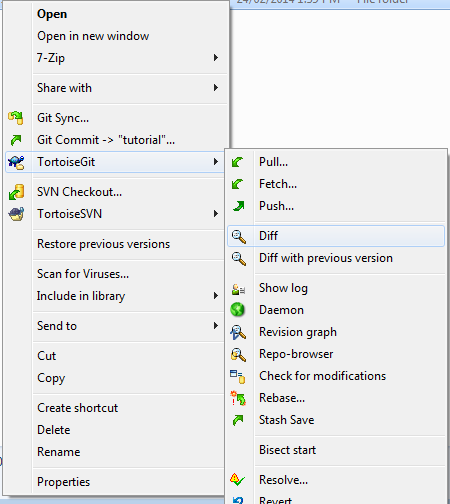
- When you're happy with the code, right click on the repository directory and select TortoiseGit -> Diff
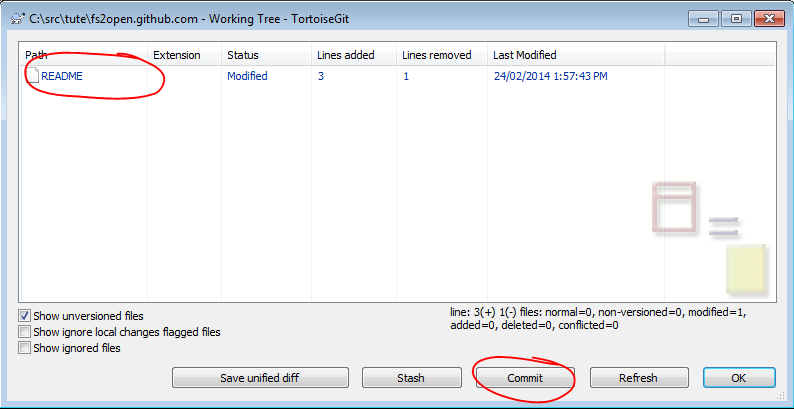
- Review your changes by double-clicking on all the files listed in the new window (ensure no unwanted changes have snuck in!).
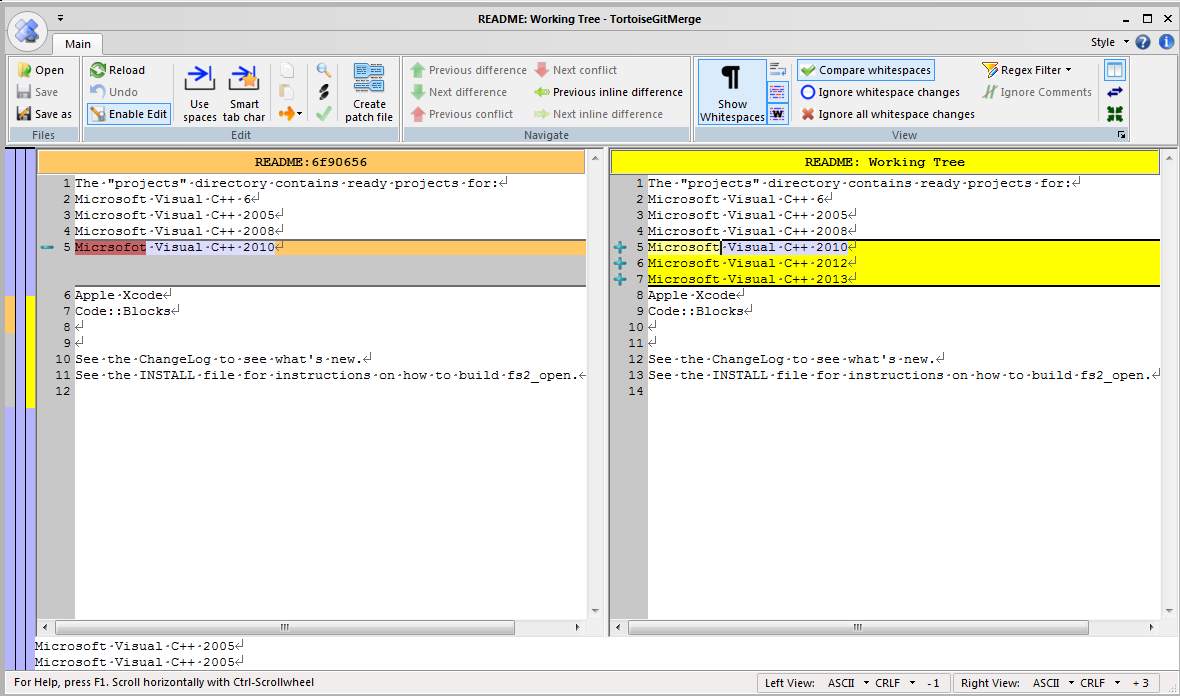
- This is how the diff will be displayed (using TortoiseGitMerge, which is also used to resolve conflicts)
- When your review is complete, press "Commit" (in the same window that you double clicked on all the changed files)
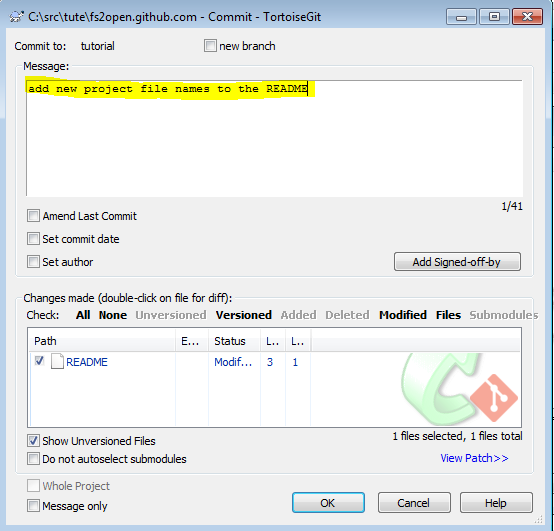
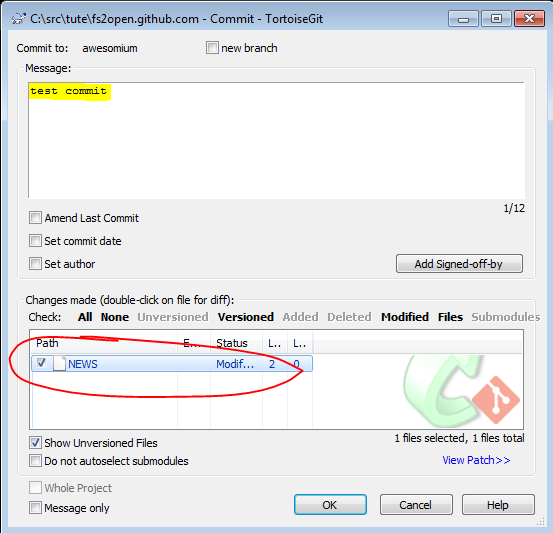
- In the new window, add a commit message and press OK
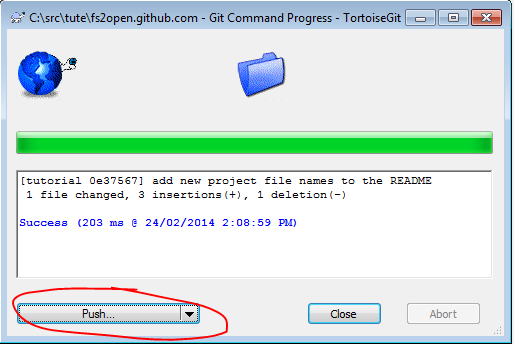
- When the commit is complete, press the "push" button to send your commit(s) to your github repository
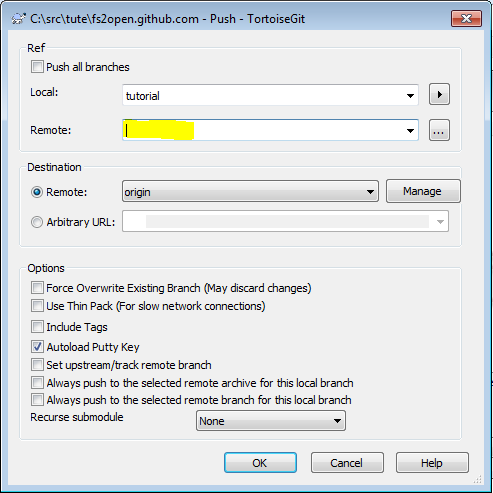
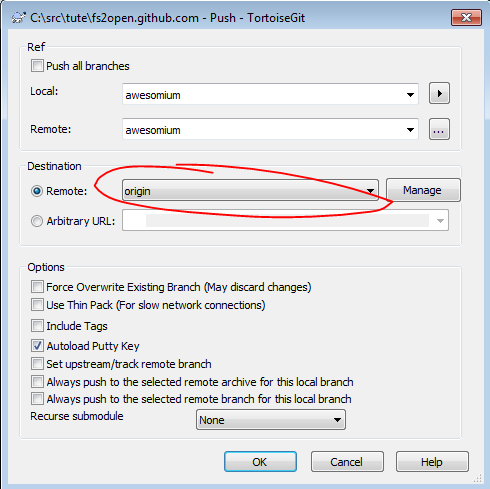
- Select your local branch name from the drop down list and ensure your Destination -> Remote: is "origin"
- If you want to, you can give the public remote branch a different name to your local branch (this can be useful when rebasing a branch already published to your public repository)
- Finally, press OK
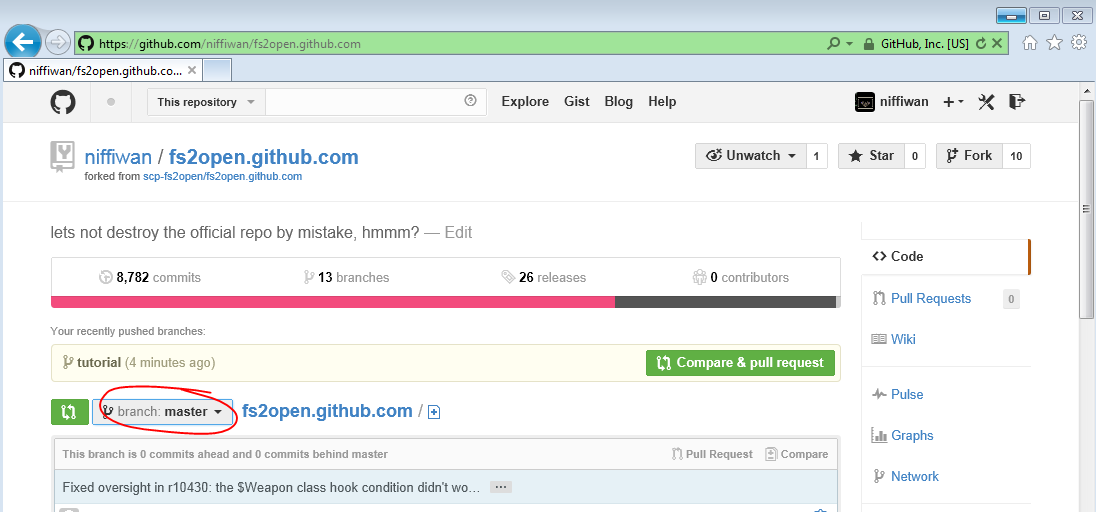
- Go to your Github Repository webpage and select the branch you just pushed
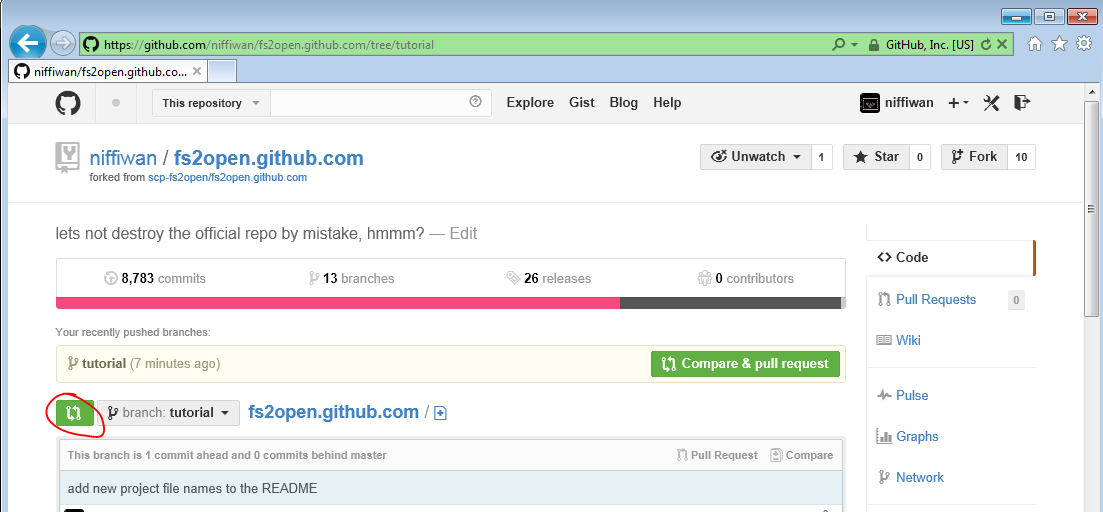
- When you have the correct branch selected, click on the "Pull/Review/Compare" button
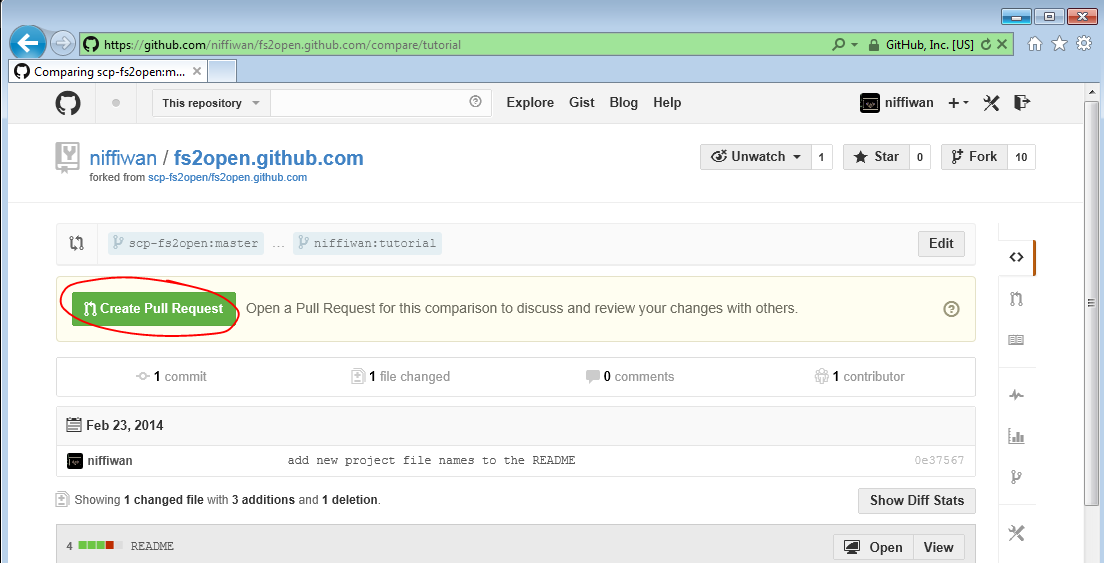
- Now click on "Create Pull Request"
- Note: the previous three steps can be done as a single step if you have recently pushed a branch by selecting the "Compare and Pull Request" button
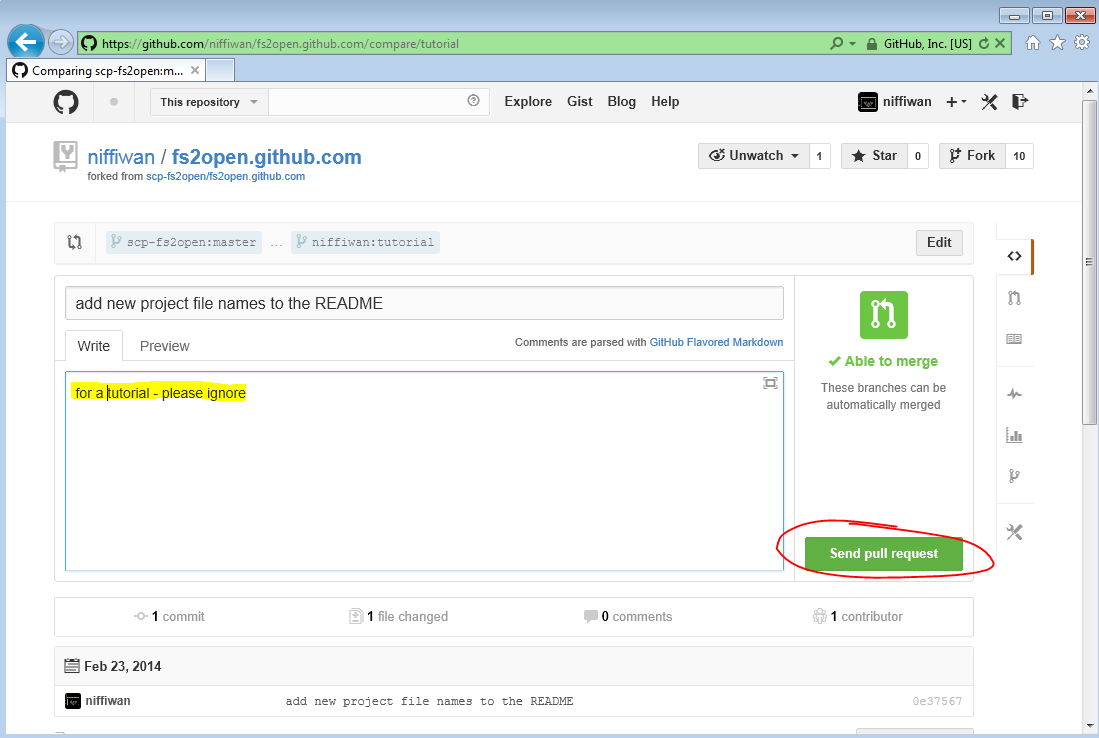
- Add comments to the pull request if you wish, then click "Send Pull Request"
- And that's it! Now you wait for the pull request to be reviewed and committed to primary FSO master branch
Syncing and Simple Conflict Resolution: Tortoise Git
This section will go over syncronizing your local git repo with a remote, as well as cover some simple conflict resolution.
Once you've committed to your local git repo and verified its integrity (a simple build-check will suffice), you should update the remote repo through the "Push" process.
- Right click on the repository directory and select "Push..."
The Push dialog is displayed. From here, you can push one or more branches from one repo to another, local and remote alike. The "Ref" control group will be the repo that will be pushed onto the repo specified in the "Destination" control group. If you are managing multiple remotes, you may also push one remote to another.
For now, we'll focus on just pushing our local repo onto the remote.
- Select the branch from the local repo in the "Ref" control group
- Select the branch from the remote repo you wish to push to in the "Destination" control group.
- Click OK to start the push
If a conflict between the remote repo and your local repo arises, git will halt the push.
Collaboration with remotes: Tortoise Git
Here we'll go through:
- adding a remote branch from someone else's repository
- committing to that branch and pushing it back to your own repository
You may do this when you're collaborating on a feature prior to it being committed to the master
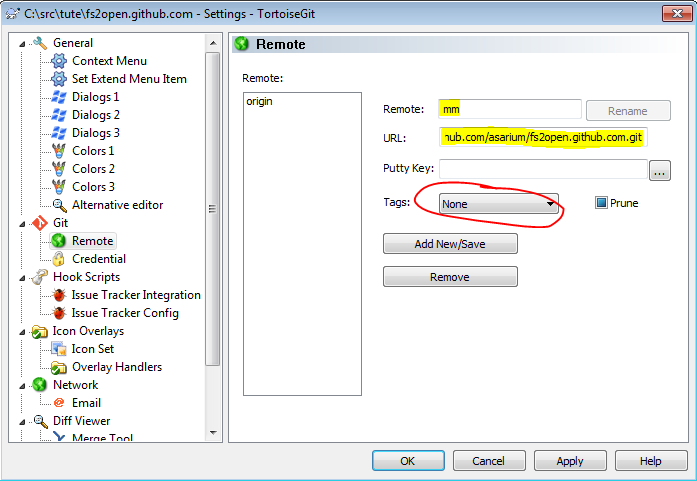
- Start by right clicking on the local repository directory and selecting "Settings"
- Select the "Remote" item from the left hand menu, then
- add a local name for the new remote repository
- add the remote repository URL (I'm using m!m's github repository in this example)
- Set the "Tags" dropdown to "None"
- Click "Add New/Save"
- You should be prompted if you want to "...fetch remote branches...", select "Yes"
- All the defaults should be fine, click "OK"
- Note that this step may take a little time
- When it's complete you want to create a local branch to track one of the remote repositories branches
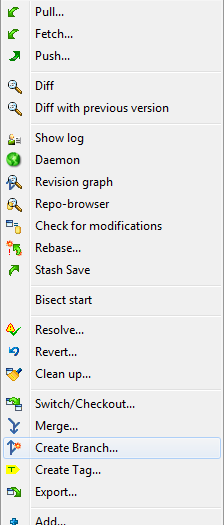
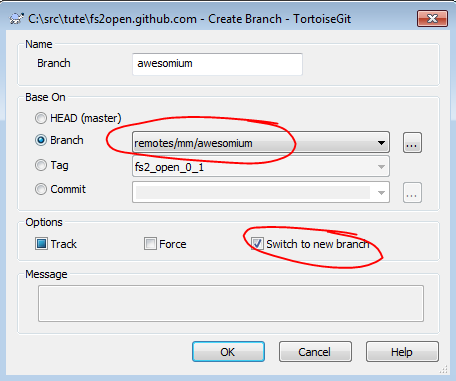
- Right click on the local repository directory and select "Create Branch..."
- Set "Base On" -> "Branch" to the remote branch you want to work on
- Check "Switch to new branch"
- Click "OK"
- Write some code!
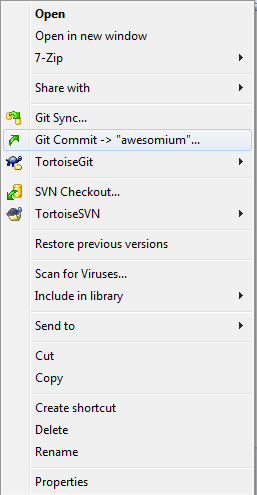
- When you're ready to commit, right click on the local repository directory and select "Git Commit -> (branchname)..."
- Enter a commit message
- Review the changes that will make up the commit by double-clicking on files in the list
- When the commit is completed there will be a button to "Push" your branch.
- You probably won't have permission to push to the other persons remote branch, so push to your own remote repository
- Optionally change the remote branch name (e.g. with a reference to the remote it can from)
- Select "Origin" as your "Destination" -> "Remote"
- Click "OK"
- Now you can tell the other person that you've added to their branch and have pushed the changes to your own remote branch
- They can now follow (most of) the steps above to add your repository as (to them) a remote and fetch/merge your changes into their branch
- When that happens you probably want to get their changes into your local branch
- Firstly ensure that you have the branch to want to merge into selected
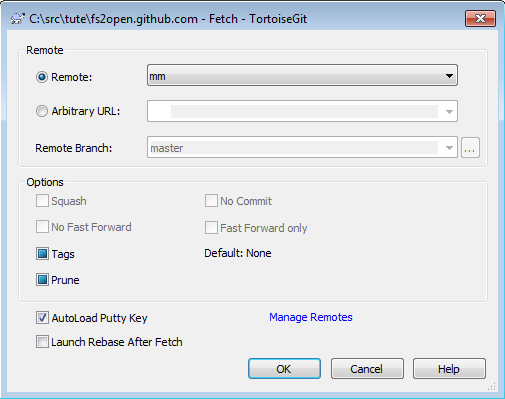
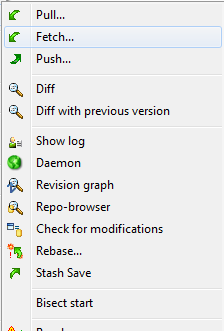
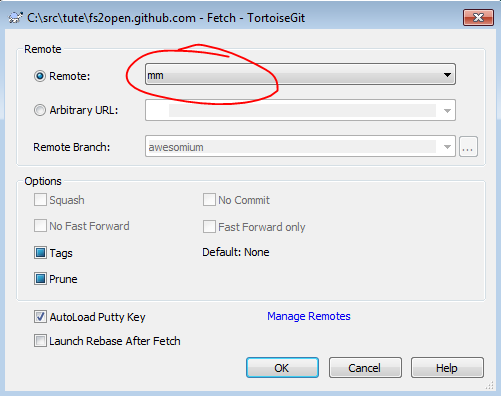
- Right click on the repository directory and select "Fetch..."
- Select the correct remote repository from the dropdown
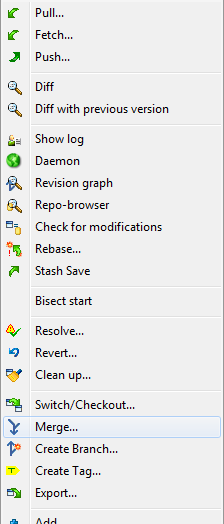
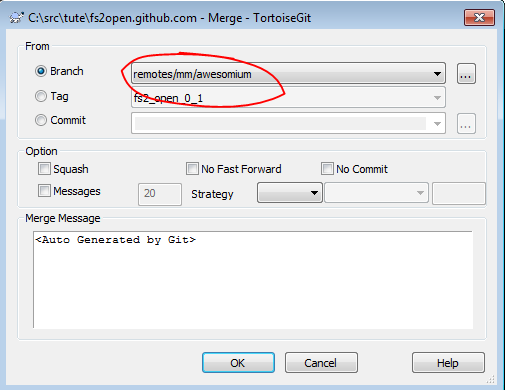
- Right click on the repository directory and select "Merge..."
- Select the correct remote branch to merge from
- Click OK and you're done (assuming there are no merge conflicts of course...)
Applying old patches (and conflict resolution)
Here's a way to apply old patches using git. When I say "old patch", you know almost for certain that it's going to have conflicts. This is based off a technique I've used with the git command line. It may be that TortoiseGit provides alternate ways of achieving this, however the advantage of this technique is that it's very similar to the conflict resolution that you may need to do when syncing your repo. (Plus I have a good example in one of Axem's patches that's been floating around for... nearly 2.5 years!)
rough notes
- TortoiseGitMerge
- right click the line numbers in the "theirs" or "mine" windows to select "text blocks" which will be applied to the "merged" window
- for simple conflicts you can also choose "theirs then mine" or vice versa from the right click menu
- by clicking on the line numbers on the left hand side you can select individual lines to apply
- similarly you can select multiple lines by click/dragging on the line numbers
- when "theirs/mine" lines are selected another right-click option becomes available, "copy". These lines can then be pasted to "merged"
- you can also make edits in the "merged" window just like any other text editor
